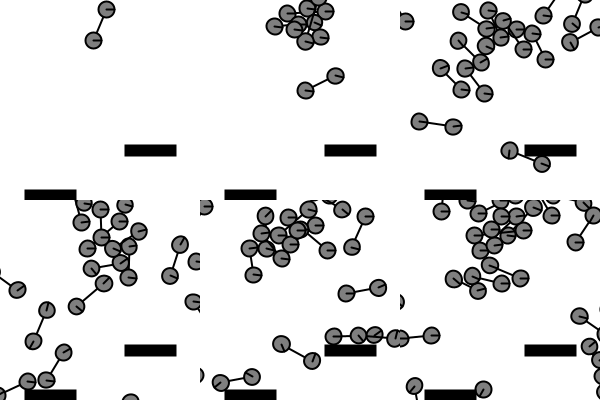
「The Nature of Code」からオブジェクトの連結について取り上げます。2つのオブジェクトを連結します。Processingでプログラムを書いて、動作を確認します。動作を確認できるところがProcessingの楽しいところです。
オブジェクト連結の手順
- ボディを2つ用意する
- ジョイントを定義する
- ジョイントのプロパティを設定する
- ボディの指定
- アンカーの位置
- レスト長
- 弾性か剛体かの指定
- ジョイントの作成
参考例
以下は、2つのオブジェクトを連結する参考例です。
//DistanceJoint
import shiffman.box2d.*;
import org.jbox2d.dynamics.joints.*;
import org.jbox2d.collision.shapes.*;
import org.jbox2d.collision.shapes.Shape;
import org.jbox2d.common.*;
import org.jbox2d.dynamics.*;
import org.jbox2d.dynamics.contacts.*;

Box2DProcessing box2d;
ArrayList<Boundary> boundaries;
ArrayList<Pair> pairs;

void setup(){
  size(200, 200);

  box2d = new Box2DProcessing(this, 20);
  box2d.createWorld();

  //空のArrayListの生成
  pairs = new ArrayList<Pair>();
  boundaries = new ArrayList<Boundary>();

  //境界の追加
  boundaries.add(new Boundary(width/4,height-5,width/2-50,10));
  boundaries.add(new Boundary(3*width/4,height-50,width/2-50,10));
}

void draw(){
  background(255);
  box2d.step();

  //ペアの生成・追加
  if(random(1) < 0.2){
    Pair p = new Pair(width/2, 30);
    pairs.add(p);
  }

  //ペアの描画
  for(Pair p: pairs){
    p.display();
  }

  //境界の描画
  for(Boundary wall: boundaries){
    wall.display();
  }
}
class Pair{
  Particle p1;
  Particle p2;
  float len;

  //コンストラクタ
  Pair(float x, float y){
    len = 32;

    p1 = new Particle(x, y);
    p2 = new Particle(x+random(-1, 1), y+random(-1, 1));

    //ジョイントの定義
    DistanceJointDef djd = new DistanceJointDef();
    djd.bodyA = p1.body;
    djd.bodyB = p2.body;
    djd.length = box2d.scalarPixelsToWorld(len);

    djd.frequencyHz = 3;
    djd.dampingRatio = 0.1;

    //ジョイントの作成
    DistanceJoint dj = (DistanceJoint)box2d.world.createJoint(djd);
  }

  //図形の描画
  void display(){
    Vec2 pos1 = box2d.getBodyPixelCoord(p1.body);
    Vec2 pos2 = box2d.getBodyPixelCoord(p2.body);
    stroke(0);
    strokeWeight(2);
    line(pos1.x, pos1.y, pos2.x, pos2.y);

    p1.display();
    p2.display();
  }
}
class Particle{
  Body body;
  float r;

  //コンストラクタ
  Particle(float x, float y){
    r = 8;

    //ボディの定義
    BodyDef bd = new BodyDef();
    bd.type = BodyType.DYNAMIC;
    bd.position = box2d.coordPixelsToWorld(x, y);
    body = box2d.world.createBody(bd);

    //形状の定義
    CircleShape cs = new CircleShape();
    cs.m_radius = box2d.scalarPixelsToWorld(r);

    FixtureDef fd = new FixtureDef();
    fd.shape = cs;
    fd.density = 1;
    fd.friction = 0.01;
    fd.restitution = 0.3;

    body.createFixture(fd);
    body.setLinearVelocity(new Vec2(random(-5, 5), random(2, 5)));
  }

  void killBody(){
    box2d.destroyBody(body);
  }

  boolean done(){
    Vec2 pos = box2d.getBodyPixelCoord(body);
    if(pos.y > height+r*2){
      killBody();
      return true;
    }
    return false;
  }

  //図形の描画
  void display(){
    Vec2 pos = box2d.getBodyPixelCoord(body);
    float a = body.getAngle();
    pushMatrix();
    translate(pos.x, pos.y);
    rotate(a);
    fill(127);
    stroke(0);
    strokeWeight(2);
    ellipse(0, 0, r*2, r*2);
    line(0, 0, r, 0);
    popMatrix();
  }
}
class Boundary{
  float x;
  float y;
  float w;
  float h;
  Body b;

  //コンストラクタ
  Boundary(float x_, float y_, float w_, float h_){
    x = x_;
    y = y_;
    w = w_;
    h = h_;

    //ポリゴンの定義
    PolygonShape sd = new PolygonShape();
    //box2dの座標
    float box2dW = box2d.scalarPixelsToWorld(w/2);
    float box2dH = box2d.scalarPixelsToWorld(h/2);
    sd.setAsBox(box2dW, box2dH);

    //ボディの定義
    BodyDef bd = new BodyDef();
    bd.type = BodyType.STATIC;
    bd.position.set(box2d.coordPixelsToWorld(x, y));
    b = box2d.createBody(bd);

    b.createFixture(sd, 1);
  }

  //図形の描画
  void display(){
    fill(0);
    stroke(0);
    rectMode(CENTER);
    rect(x, y, w, h);
  }
}

まとめ
「The Nature of Code」からオブジェクトの連結について取り上げました。2つのオブジェクトを連結しました。引き続き、「The Nature of Code」の内容を勉強します。
参考書籍
※Javaの勉強にもなるので一石二鳥です。